Baking has a special way of bringing people together, don’t you think? When I first discovered Thumbprint Cookies, I felt like I had unearthed a delicious secret. The moment my fingers pressed into the soft dough, creating perfect little indents for the vibrant, fruity jam, I could already picture treats that would delight family and friends alike. These cookies are not just a tasty dessert; they carry a heartfelt touch, making them the perfect addition to any gathering—especially around Valentine’s Day.
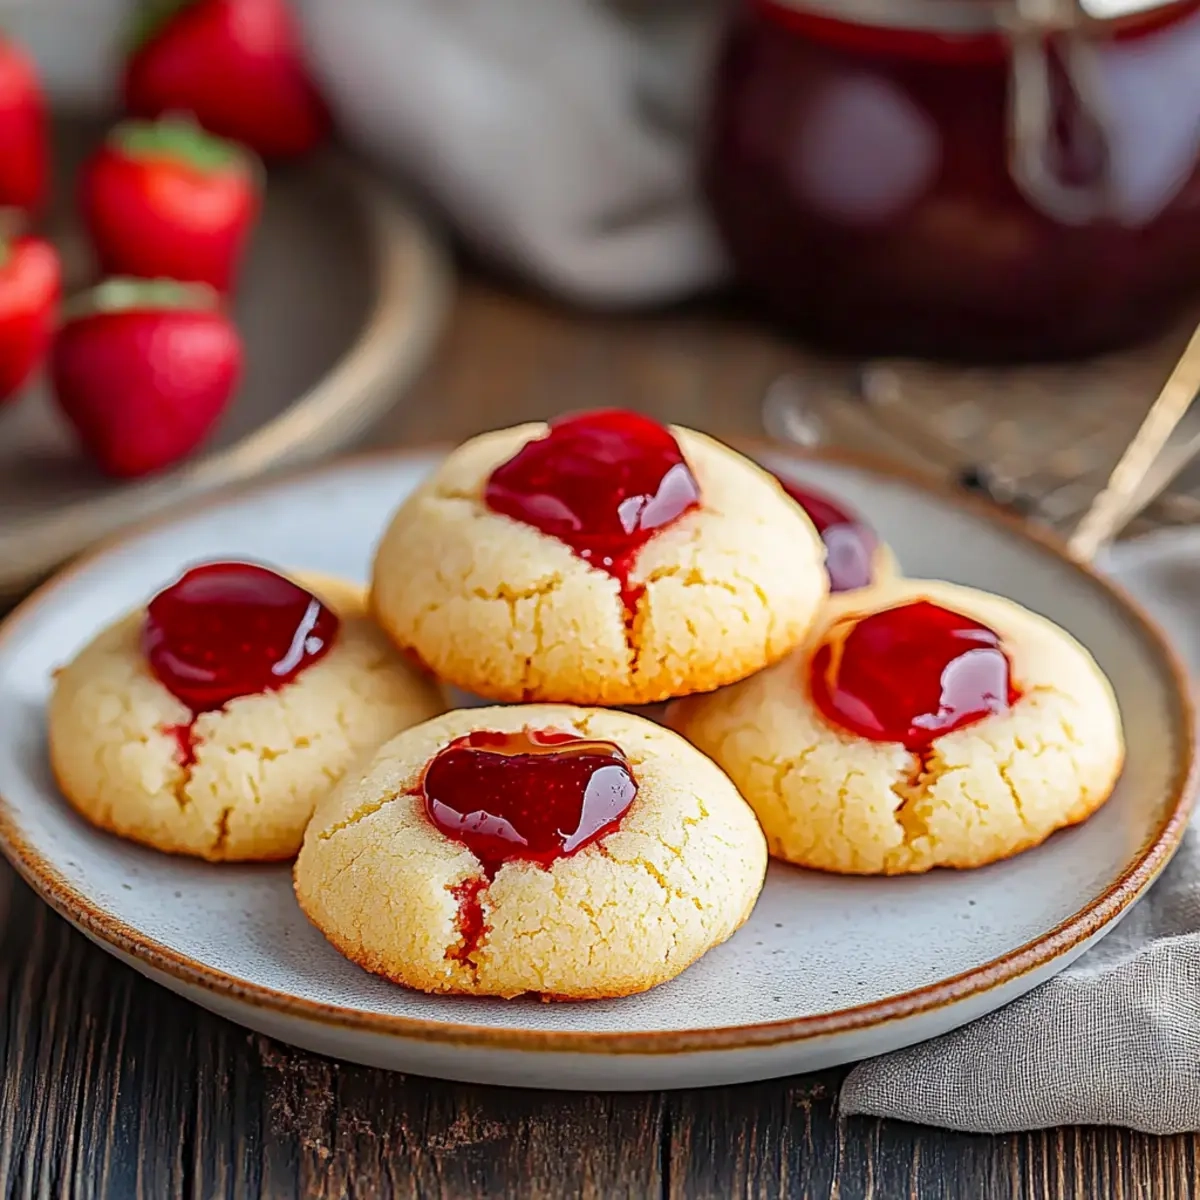
Imagine the joy of sharing these sweet bites, with their buttery softness wrapped around a delightful jam center. Simple yet impressive, they come together in just 15 minutes, making them a great choice for those busy evenings when you crave something homemade to soothe your soul. So, let’s roll up our sleeves and create a batch of these charming Valentine Thumbprint Cookies that are bound to steal hearts and satisfy your sweet tooth!
Why You'll Love This Thumbprint Cookies
- These Thumbprint Cookies are incredibly easy to make, perfect for both novice and experienced bakers alike.
- With just a quick 15 minutes of prep time, you’ll have a delicious treat ready to bake in no time.
- The combination of buttery cookie and vibrant jam creates a flavor explosion that is sure to impress anyone who tries them.
- These cookies are wonderfully versatile, allowing you to experiment with different jams or jellies to suit any occasion or personal preference.
- Their charming appearance with colorful centers makes them visually appealing, perfect for sharing at gatherings or special events.
- Finally, these delightful cookies are a crowd-pleaser, guaranteed to bring smiles and sweet memories to every celebration.
Thumbprint Cookies Ingredients
• Essential components for delightful bites.
For the Dough
- All-purpose flour – a versatile base that gives the cookies structure.
- Unsalted butter – ensures a rich, creamy texture; remember to soften for easy mixing.
- Granulated sugar – adds sweetness and helps create a light cookie.
- Light brown sugar – brings depth and a hint of caramel flavor.
- Egg yolk – enriches the dough; don’t forget to separate it carefully!
- Vanilla extract – elevates the flavor profile with its warm aroma.
For the Filling
- Jam or jelly (raspberry or strawberry recommended) – the luscious heart; feel free to explore other flavors for a twist!
Embrace the joy of baking these Thumbprint Cookies that are sure to light up your special moments!

How to Make Thumbprint Cookies
-
Preheat your oven to 350°F (175°C) and get ready to fill your kitchen with the sweet scent of baking. Line two baking sheets with parchment paper for easy cleanup and to prevent sticking.
-
Cream together the softened unsalted butter, granulated sugar, and light brown sugar in a large bowl. Mix until the mixture is light and fluffy; this usually takes about 2-3 minutes. The texture should be smooth and well combined.
-
Incorporate the egg yolk and vanilla extract into the creamed mixture. Stir until everything is evenly combined, creating a luscious, flavorful base for your cookies.
-
Gradually add the all-purpose flour to the mixture. Combine gently until just incorporated; avoid overmixing to ensure your cookies remain tender and melt-in-your-mouth delicious.
-
Shape the dough into one-inch balls using your hands, placing them on the prepared baking sheets, with at least two inches of space between each ball for proper spreading during baking.
-
Press your thumb or a teaspoon into the center of each dough ball to create indents. Fill each indentation with about half a teaspoon of your chosen jam; don’t be shy—this is the heart of the cookie!
-
Bake the cookies in your preheated oven for 12-15 minutes or until the edges are lightly golden. The aroma will be irresistible! Allow them to cool on the baking sheet for a few minutes before transferring them to a wire rack to cool completely.
Optional: Dust with powdered sugar for an extra sweet touch!
Exact quantities are listed in the recipe card below.
Make Ahead Options
These delightful Thumbprint Cookies are perfect for meal prep enthusiasts! You can make the cookie dough up to 24 hours in advance, simply wrap it tightly in plastic wrap and refrigerate it to keep it fresh and prevent drying. On the day you’re ready to bake, roll the dough into balls, create indents, fill with your favorite jam, and bake them as usual. If you’re looking for even more convenience, baked cookies can be stored in an airtight container for up to 3 days at room temperature, maintaining their wonderful texture and flavor. Just remember to let them cool completely before storing to prevent sogginess. With these easy make-ahead tips, you can enjoy delicious Thumbprint Cookies with minimal effort on busy weeknights!
What to Serve with Thumbprint Cookies?
Creating the perfect spread for your sweet Thumbprint Cookies means finding those lovely contrasts and complements that will elevate your gathering.
-
Fresh Berries: Juicy strawberries or raspberries enhance the fruity notes in the cookies, making each bite burst with flavor. Their vibrant colors also add a beautiful touch to your dessert table.
-
Vanilla Ice Cream: A scoop of velvety vanilla ice cream pairs wonderfully, balancing the sweetness with creaminess. The cold and warm contrast offers a delightful experience that will be soothing for your taste buds.
-
Coffee or Espresso: The rich notes of a freshly brewed cup offer a perfect counterpoint to the buttery sweetness of the cookies. Plus, sipping a warm drink while indulging in treats creates a cozy, inviting atmosphere.
-
Tea (Earl Grey or Chamomile): A floral or citrus-infused tea brings out the vanilla flavor in your Thumbprint Cookies. The soothing aroma complements the cookie’s buttery texture, making for a peaceful afternoon treat.
-
Chocolate Drizzle: A light drizzle of dark chocolate adds a rich depth that beautifully contrasts with the sweet jam filling. Just a touch can make these cookies feel extra indulgent and festive.
-
Fruit Salad: A refreshing mix of seasonal fruits offers a light, crisp complement to the sweetness of the cookies. The acidity in fruits like pineapple or kiwi can balance the dessert’s richness, making for a well-rounded meal.
-
Sparkling Water with Lemon: A bubbly drink infused with fresh lemon is a refreshing palate cleanser that brightens up the whole experience. It keeps the flavors crisp and complements the cookies without overpowering them.
-
Whipped Cream: A dollop of softly whipped cream enhances the sweetness while adding a luxurious texture. It turns humble cookies into a delightful dessert, perfect for special occasions.
Storage Tips for Thumbprint Cookies
Room Temperature: Store your Thumbprint Cookies in an airtight container at room temperature for up to 3 days to maintain their freshness.
Fridge: If you want to extend their life, refrigerate them for about a week. Remember to keep them in an airtight container to prevent them from drying out.
Freezer: For long-term storage, freeze the cookies in a single layer on a baking sheet, then transfer to an airtight container or freezer bag for up to 3 months.
Reheating: To enjoy them warm, reheat the frozen Thumbprint Cookies by placing them in the oven at 300°F (150°C) for about 5-7 minutes.
Thumbprint Cookies Variations
Feel free to get creative and make this recipe your own with these delightful twists!
-
Nutty Addition: Fold in 1/2 cup of chopped nuts for a crunchy texture that beautifully complements the soft cookies. Think walnuts or almonds for extra flavor!
-
Chocolate Lovers: Replace half of the jam with melted chocolate or Nutella. Rich chocolaty centers will delight anyone with a sweet tooth!
-
Citrus Zest: Add a teaspoon of orange or lemon zest to the dough to brighten the flavor profile, creating a lovely citrus twist that freshens each bite.
-
Gluten-Free: Swap the all-purpose flour with a gluten-free blend. This allows those with dietary restrictions to enjoy these cookies without missing out on deliciousness!
-
Spicy Kick: Sprinkle in a pinch of cinnamon or nutmeg for a warm, spicy note. These subtle spices bring a comforting depth to every cookie.
-
Berry Medley: Try mixing different jams, like blueberry, blackberry, or even a tropical mango flavor. Combining different fruity fillings creates a vibrant assortment that surprises and delights!
-
Dairy-Free: Substitute the unsalted butter with coconut oil or a vegan butter alternative. This swap keeps the cookies just as delicious and suitable for dairy-free diets.
-
Fun Sprinkles: Before baking, top each filled indent with colorful sprinkles. This playful addition makes your cookies more festive and fun for celebrations!
Let your imagination guide you as you whip up these sweet treats—there are endless possibilities waiting for you!
Chef's Helpful Tips
- For the best Thumbprint Cookies, ensure your butter is at room temperature for easier mixing and a smoother dough.
- Be careful not to overmix once you add the flour, as this can lead to tough cookies; a gentle fold is key.
- When pressing the indents, use a light touch so you don’t flatten the dough too much; the cookies should be slightly raised.
- Make sure to keep an eye on the baking time and look for those golden edges to indicate they’re done baking.
Thumbprint Cookies Recipe FAQs
How do I choose the right jam or jelly for Thumbprint Cookies?
Absolutely! When it comes to choosing jam or jelly, look for options that are thick and spreadable without being too runny. Raspberry and strawberry are classic choices for their vibrant color and delicious flavor, but you can also experiment with apricot, blueberry, or even chocolate spreads for a unique twist. Just ensure that the consistency is firm enough to hold up when baked!
How should I store my baked Thumbprint Cookies?
Very! To keep your Thumbprint Cookies fresh, store them in an airtight container at room temperature for up to 3 days. If you’re looking to extend their shelf life, refrigerate them in a sealed container for about a week. However, for maximum freshness, freezing is always a good option. Just remember to separate layers with parchment paper to prevent sticking!
Can I freeze Thumbprint Cookies, and if so, how?
Absolutely! Freezing Thumbprint Cookies is a great way to save them for later. First, allow the cookies to cool completely. Then, place them in a single layer on a baking sheet and freeze for about 1 hour until firm. Next, transfer them to an airtight container or freezer bag, separating layers with parchment paper, and they can be stored for up to 3 months. When you’re ready to enjoy them, simply reheat in a 300°F (150°C) oven for 5-7 minutes!
What can I do if my dough is too dry or crumbly?
If you find your dough is too dry, don’t worry! This can happen sometimes if the flour is packed too tightly. Simply add a teaspoon of milk or water, and mix gently until the dough comes together. The dough should be soft and pliable, but not sticky. Remember, a little hydration goes a long way—take it slow and keep mixing until you reach that perfect consistency!
Are Thumbprint Cookies safe for pets?
No, it’s best to avoid sharing Thumbprint Cookies with your pets. Ingredients like butter and sugar can be harmful in large quantities to animals, and the jams may contain xylitol or other additives that are toxic to dogs. Always stick to pet-safe treats for your furry friends to ensure their health and happiness!
Can I make these cookies gluten-free?
Yes, very much so! To adapt Thumbprint Cookies to a gluten-free diet, simply substitute the all-purpose flour with a gluten-free flour blend that contains xanthan gum. Most blends work perfectly for cookies, but always check the packaging to ensure compatibility. Follow the same steps, and you’ll have delicious gluten-free Thumbprint Cookies in no time!
Thumbprint Cookies
Ingredients
Equipment
Method
- Preheat your oven to 350°F (175°C) and line two baking sheets with parchment paper.
- Cream together the softened unsalted butter, granulated sugar, and light brown sugar until light and fluffy.
- Incorporate the egg yolk and vanilla extract into the creamed mixture until evenly combined.
- Gradually add the all-purpose flour to the mixture and combine gently until just incorporated.
- Shape the dough into one-inch balls and place them on the prepared baking sheets with space in between.
- Press your thumb or a teaspoon into the center of each dough ball to create indents and fill with jam.
- Bake for 12-15 minutes or until the edges are lightly golden; cool on baking sheets before transferring.


Leave a Comment