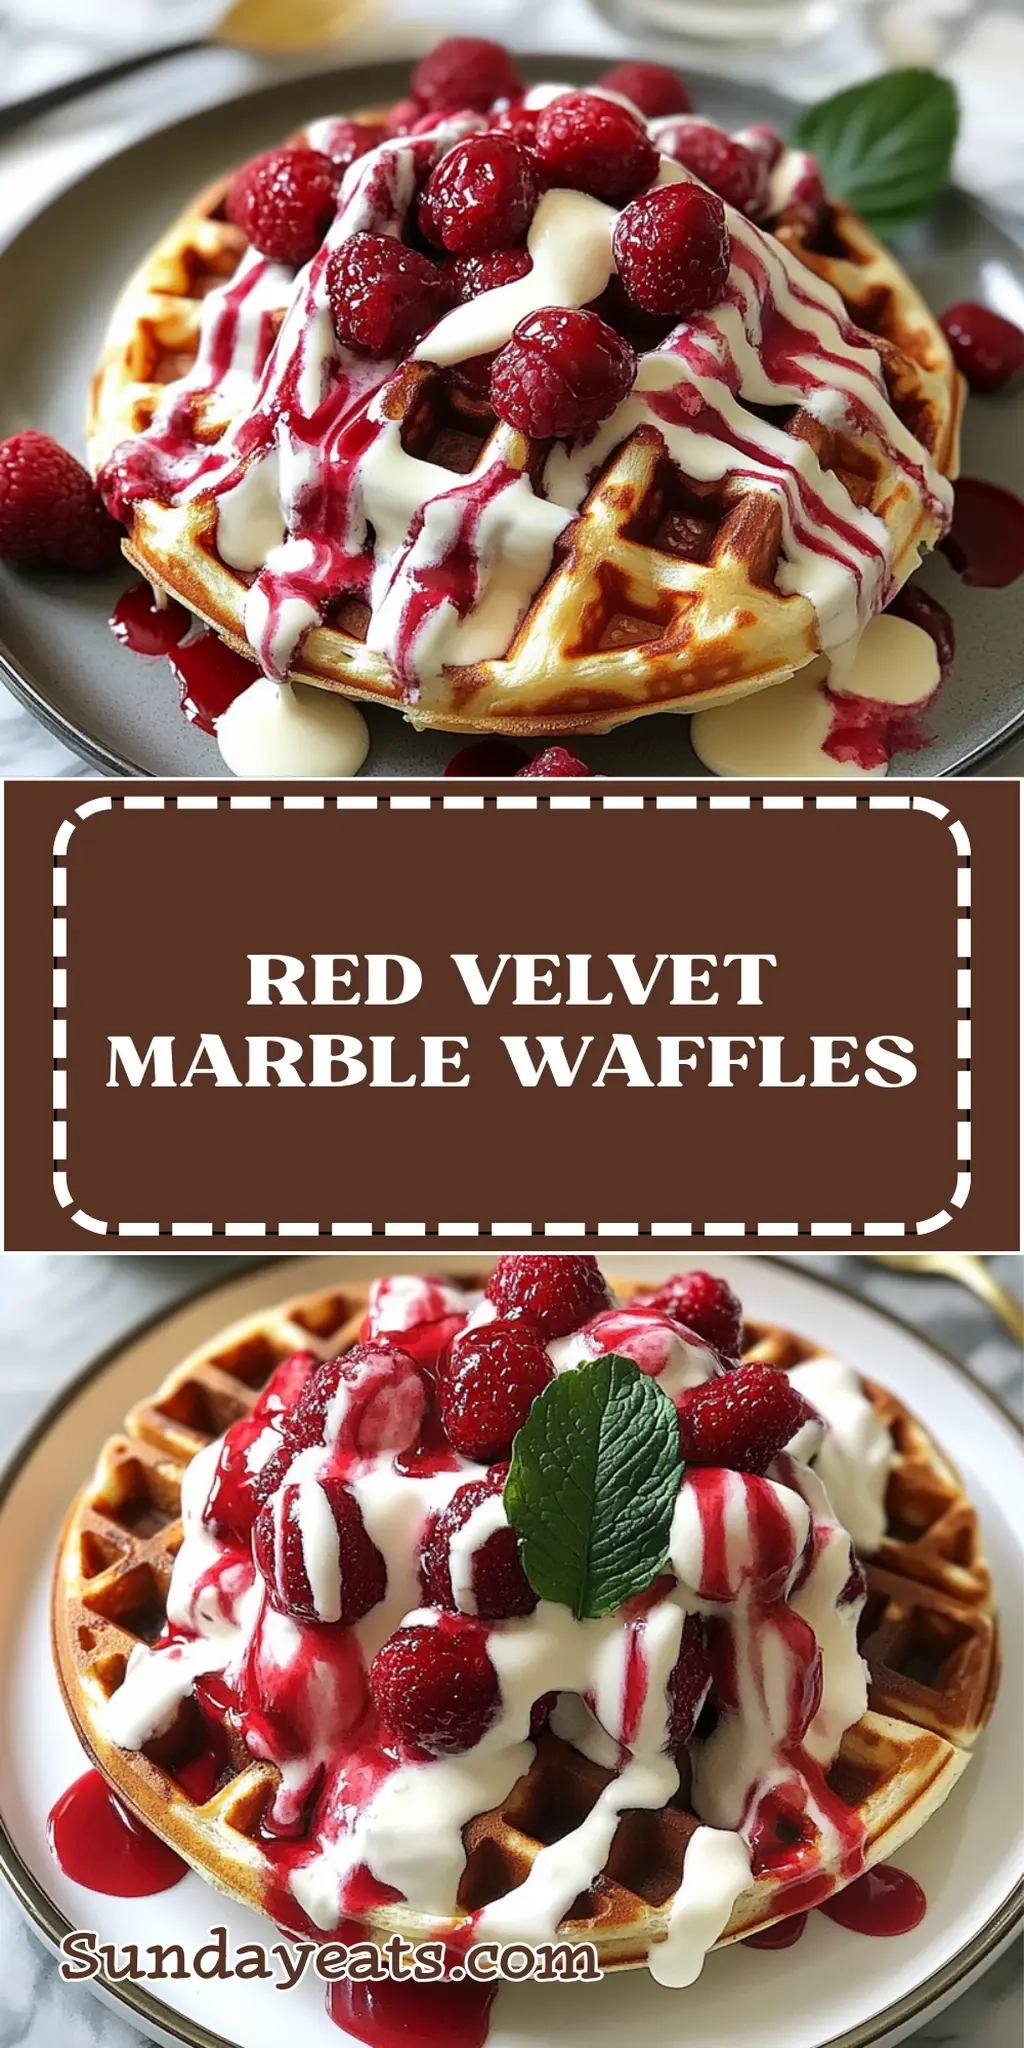
When the weekend rolls around, there’s nothing quite like indulging in a brunch that feels special without demanding hours in the kitchen. I recently stumbled upon a delightful recipe that combines two of my favorites: the allure of red velvet and the fun of waffles! Picture a plate of Red Velvet Marble Waffles, their deep crimson hues zigzagged with rich cocoa, ready to be drizzled with syrup and topped with a burst of fresh red fruits.
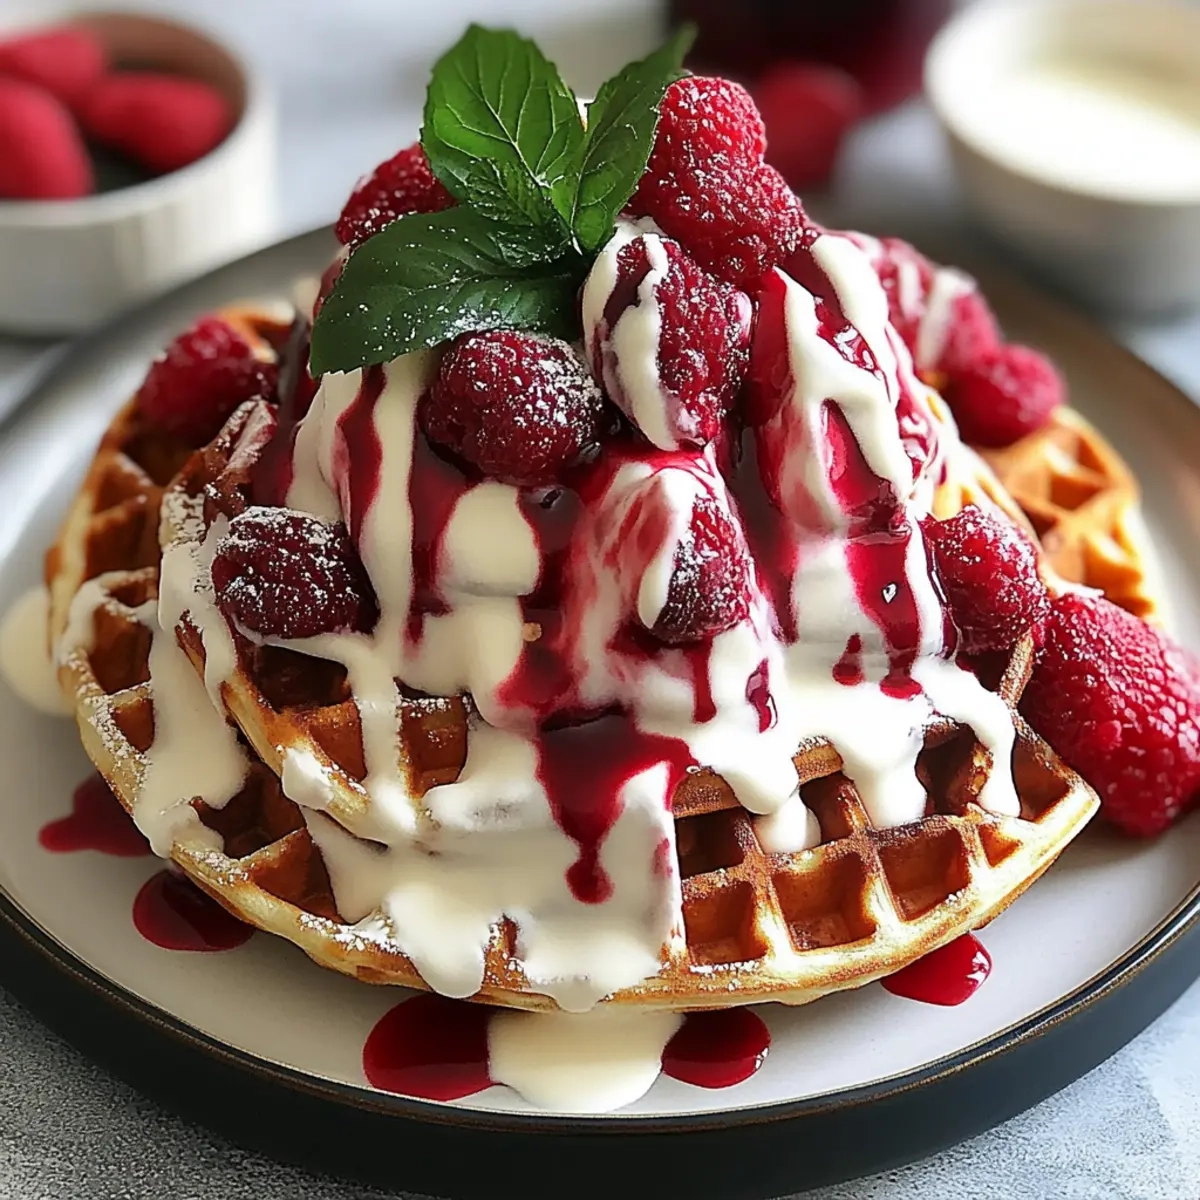
The moment I poured the batter into the waffle maker, I could hardly contain my excitement. The smell of baking chocolate filled the air, igniting a sense of nostalgia from childhood waffles topped with sweet toppings. They’re not just visually stunning; these waffles are light, fluffy, and a treat for both the eyes and the taste buds.
Whether you’re hosting a festive brunch or simply treating yourself, these Red Velvet Marble Waffles promise to elevate your morning in just 25 minutes. Say goodbye to boring breakfasts and get ready to impress with this gorgeous, crowd-pleasing delight!
Why You'll Love This Red Velvet Marble Waffles
- These Red Velvet Marble Waffles are a fun and easy way to elevate your breakfast routine.
- Their striking visual appeal makes them a showstopper, ensuring that your brunch spreads look as delightful as they taste.
- With a quick prep and cook time of just 25 minutes, you can whip these up without spending the entire morning in the kitchen.
- The combination of rich chocolate and vibrant red velvet flavors will have everyone coming back for seconds, making them a true crowd-pleaser.
- Serve them topped with fresh red fruits for an extra burst of flavor and freshness that really brings the dish together.
Red Velvet Marble Waffles Ingredients
For the Waffle Batter
- All-purpose flour – gives the waffles a light and fluffy texture.
- Unsweetened cocoa powder – adds a rich chocolate flavor that balances the sweetness.
- Granulated sugar – enhances the sweetness of the waffles; feel free to adjust based on your taste.
- Baking powder – ensures your waffles rise and become fluffy.
- Salt – a pinch enhances the overall flavor profile.
- Whole milk (or almond milk) – keeps the batter smooth; almond milk is a great dairy-free alternative.
- Large egg – binds the ingredients together, giving structure to your waffles.
- Vegetable oil – keeps the waffles moist and tender.
- Red food coloring – essential for achieving that iconic red velvet hue in the waffles.
For the Topping
- Fresh red fruits (e.g., strawberries, raspberries) – not only brighten up the dish but also add a refreshing burst of flavor to your Red Velvet Marble Waffles.
How to Make Red Velvet Marble Waffles
-
Preheat your waffle maker according to the manufacturer’s instructions. This ensures that your waffles cook evenly and come out crispy and delicious!
-
Whisk together in a large bowl: combine all-purpose flour, cocoa powder, granulated sugar, baking powder, and salt. Mixing these dry ingredients thoroughly helps create a consistent batter.
-
Mix wet ingredients in another bowl: add milk, egg, vegetable oil, and red food coloring. Stir until you achieve a smooth and vibrant mixture that will bring your waffles to life!
-
Combine the wet and dry ingredients. Gently pour the wet mixture into the dry ingredients and stir until just combined—don’t worry about a few lumps; that’s perfectly okay!
-
Divide the batter in half: keep one half as is for a rich chocolate flavor and mix extra food coloring into the other half for that bright red color, creating a beautiful marbled effect.
-
Pour both batters into the preheated waffle maker. Pour alternating spoonfuls of each batter to create your marbled design. Close the lid carefully.
-
Cook until golden brown and crispy, usually about 5-7 minutes, or according to your waffle maker’s instructions. Once done, open the lid and admire your gorgeous creation before serving!
Optional: Serve topped with fresh red fruits for a splash of color and a burst of fruity goodness.
Exact quantities are listed in the recipe card below.
Make Ahead Options
These Red Velvet Marble Waffles are perfect for meal prep enthusiasts! You can mix the dry ingredients (flour, cocoa powder, sugar, baking powder, and salt) and store them in an airtight container for up to 3 days. Similarly, whisk together the wet ingredients (milk, egg, vegetable oil, and red food coloring) and refrigerate for up to 24 hours. When you’re ready to serve, simply combine both mixtures and proceed with cooking the waffles as per the instructions. To maintain their light and fluffy texture, avoid overmixing the batter. Rest assured, these waffles will be just as delicious and beautifully marbled when enjoyed fresh from the waffle maker!
Red Velvet Marble Waffles Variations
Feel free to let your creativity shine and customize your waffles to savor every bite in your own special way!
- Dairy-Free: Use almond milk or oat milk instead of whole milk to keep the rich texture without dairy.
- Whole Wheat: Swap all-purpose flour with whole wheat flour for a nuttier flavor and added health benefits.
- Nutty Twist: Fold in chopped pecans or walnuts to the batter for delightful crunch and flavor.
- Spiced Up: Add a pinch of cinnamon or nutmeg to the dry ingredients for a warm, cozy vibe.
- Chocolate Chips: Stir in mini chocolate chips for an extra layer of indulgence that chocolate lovers will adore.
- Berry Infusion: Instead of topping with fresh fruits, blend finely chopped strawberries into the batter for a fruity surprise in every bite.
- Vegan Version: Replace the egg with a flaxseed meal mixture (1 tbsp flaxseed meal + 2.5 tbsp water) for a plant-based option that works beautifully.
- Add Zest: A touch of orange or lemon zest can provide a refreshing brightness that balances the sweetness of the waffles.
Explore these variations to make your Red Velvet Marble Waffles a delightful, personalized treat every time!
What to Serve with Red Velvet Marble Waffles?
Elevate your brunch experience with delightful pairings that complement these lush and vibrant waffles.
-
Whipped Cream: A dollop adds a sweet, airy touch enhancing the luxurious feel. It’s the perfect contrast to the rich cocoa and velvety red.
-
Maple Syrup: Drizzling warm maple syrup brings a caramelized sweetness that perfectly balances the chocolate and fruity toppings. It’s a classic choice that never disappoints!
-
Fresh Mint Leaves: Adding a sprig of mint elevates your presentation and introduces a refreshing layer that harmonizes with the red fruits.
-
Crispy Bacon: The salty crunch is an ideal contrast to the sweetness of the waffles, creating a sweet-and-savory experience that dances on your palate.
-
Hot Chocolate: Sip on a warm mug of hot chocolate for an indulgent pairing. The richness enhances the chocolate in the waffles, making every bite a cozy treat.
-
Coconut Yogurt: The creamy texture and light tang of coconut yogurt serve as a perfect accompaniment, balancing the richness while adding an exotic flair.
-
Sliced Bananas: Soft, sweet banana slices on top or on the side offer a comforting flavor that pairs nicely with the waffles’ vibrant red and chocolate hues.
-
Iced Coffee: For a refreshing beverage, iced coffee gives that caffeine kick while cooling the palate, allowing you to enjoy your meal even more.
-
Berries Compote: A warm berry compote adds a fruity burst that complements the textures and flavors of your waffles beautifully.
Make your brunch an unforgettable feast with these delightful pairings!
How to Store and Freeze Red Velvet Marble Waffles
Fridge: Store leftover Red Velvet Marble Waffles in an airtight container for up to 3 days. This keeps them fresh and prevents them from becoming soggy.
Freezer: For longer storage, freeze waffles in a single layer, then transfer to a freezer-safe bag for up to 2 months. They can easily be reheated later!
Reheating: To reheat, simply pop the waffles in the toaster or oven until crispy again. Avoid microwaving, as it can make them chewy instead of crunchy.
Room Temperature: If you’re enjoying them soon after cooking, keep waffles at room temperature for about 2 hours. Just make sure they’re covered to maintain their texture!
Chef's Helpful Tips
- For the best Red Velvet Marble Waffles, make sure to preheat your waffle maker thoroughly to achieve that perfect crispy texture.
- A common mistake is overmixing the batter; stir just until the ingredients are combined to maintain fluffiness.
- When adding extra food coloring to one half of the batter, start with a small amount and gradually increase to avoid overwhelming the flavor.
- Remember that cooking times can vary between waffle makers, so keep an eye on your waffles and check for a golden brown finish for optimal results.
Red Velvet Marble Waffles Recipe FAQs
What type of milk can I use for Red Velvet Marble Waffles?
Absolutely! You can use whole milk for a rich flavor, or almond milk if you prefer a dairy-free alternative. Both will keep your batter smooth and help achieve that perfect waffle texture.
How should I store leftover waffles?
To store leftover Red Velvet Marble Waffles, place them in an airtight container and refrigerate for up to 3 days. This will keep them fresh while maintaining their deliciousness. Make sure they are cool before sealing to prevent condensation.
Can I freeze Red Velvet Marble Waffles?
Yes, you can! To freeze your waffles, first lay them in a single layer on a baking sheet and place them in the freezer for about 1 hour until they’re firm. Once frozen, transfer them to a freezer-safe bag. They’ll be good for up to 2 months! To reheat, just pop them in the toaster or an oven until they are crispy again.
What if my waffles are sticking to the waffle maker?
If you’re having trouble with sticking waffles, make sure you’ve preheated the waffle maker properly and consider using a little non-stick spray on the surface before pouring in your batter. Ensuring there’s enough oil in your batter can also help achieve that perfect golden brown finish without sticking.
Can I use a different type of flour for this recipe?
Sure thing! While all-purpose flour works perfectly, you can try using whole wheat flour for a healthier option. Just be aware that this may slightly alter the texture. If you’re looking for a gluten-free version, consider using a 1:1 gluten-free flour blend!
Are these waffles suitable for pets?
No, it’s best to avoid feeding your pets any part of the Red Velvet Marble Waffles, particularly with ingredients like red food coloring and sugar, which aren’t suitable for them. Always keep your furry friends away from human treats to ensure they stay safe and healthy!
Red Velvet Marble Waffles
Ingredients
Equipment
Method
- Preheat your waffle maker according to the manufacturer's instructions.
- Whisk together in a large bowl: combine all-purpose flour, cocoa powder, granulated sugar, baking powder, and salt.
- Mix wet ingredients in another bowl: add milk, egg, vegetable oil, and red food coloring.
- Combine the wet and dry ingredients. Stir until just combined.
- Divide the batter in half: keep one half as is and mix extra food coloring into the other half.
- Pour both batters into the preheated waffle maker, alternating spoonfuls of each.
- Cook until golden brown and crispy, usually about 5-7 minutes.

Leave a Comment