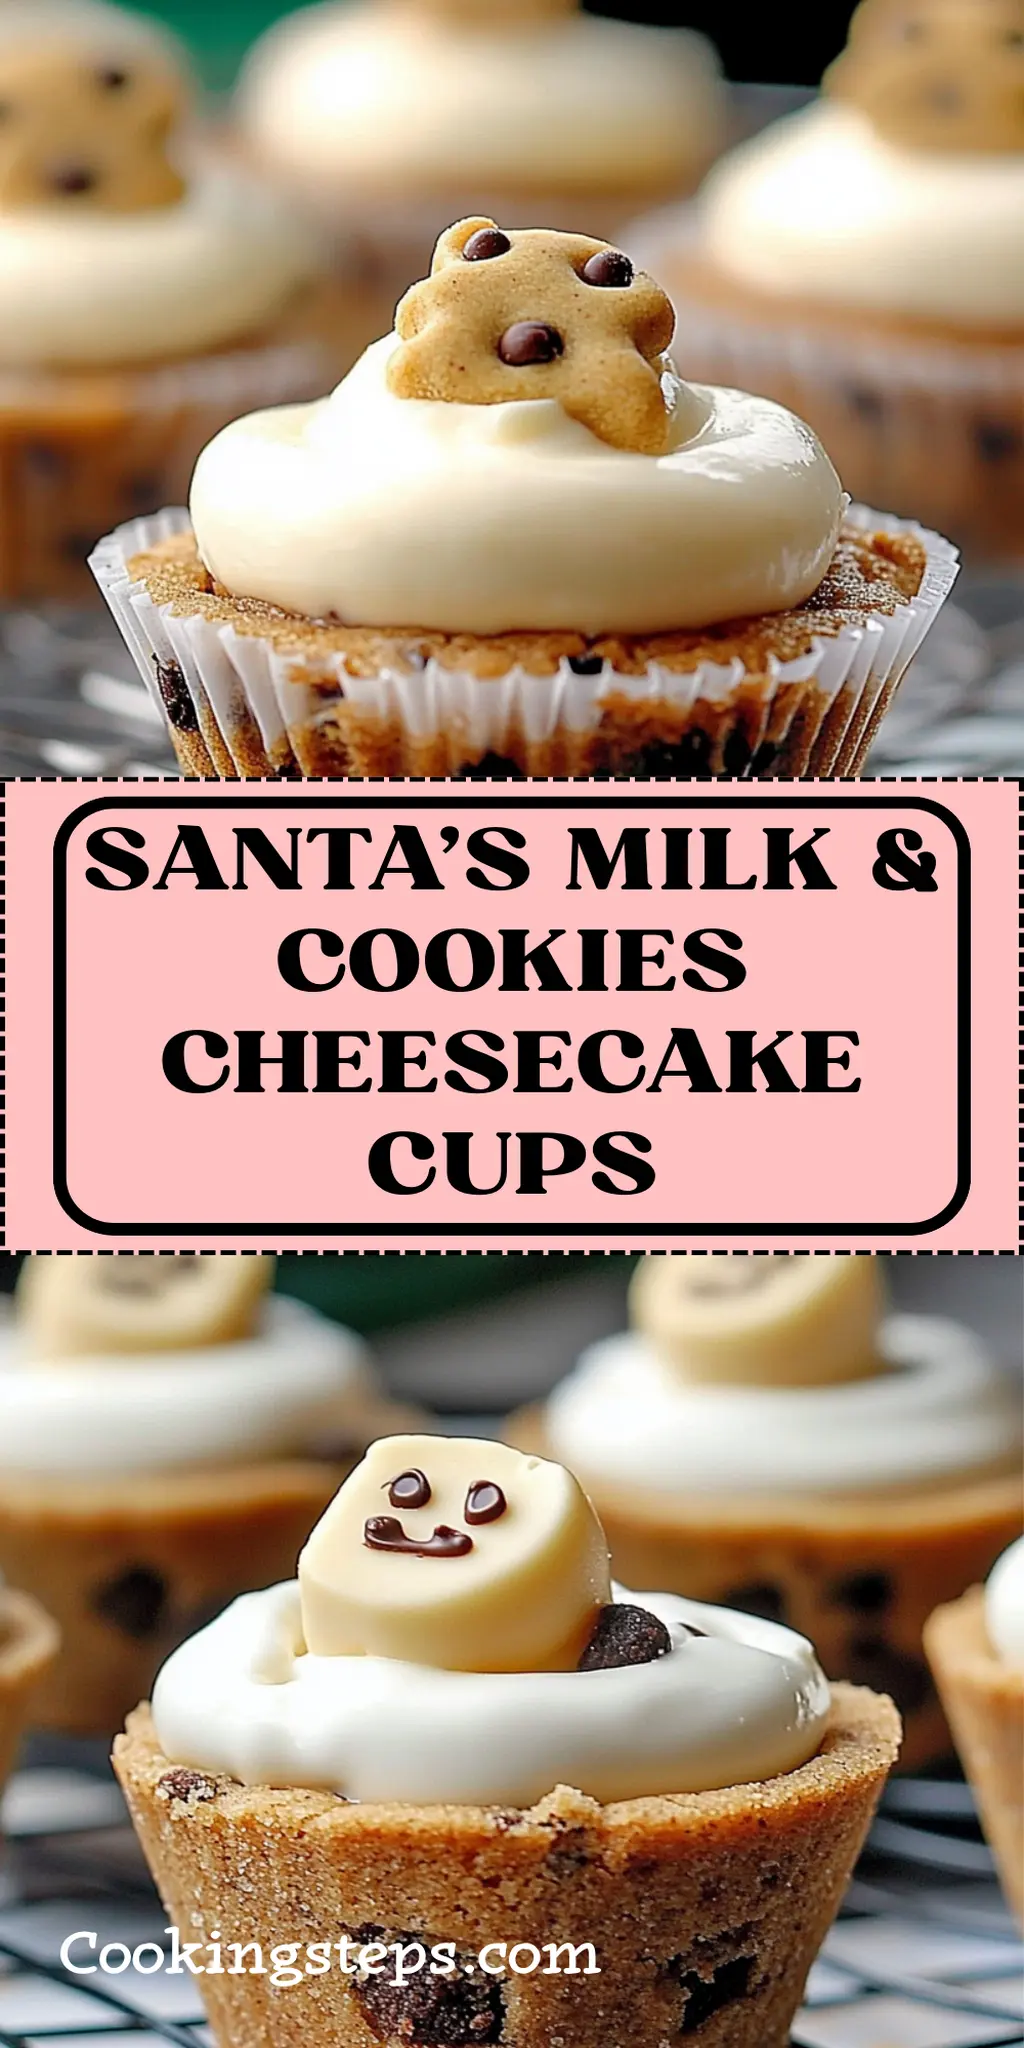
There’s something undeniably nostalgic about a summer afternoon, when the kitchen is filled with the scent of baked goodies, and the joy of indulging in sweets seems to captivate both young and old alike. That’s how I stumbled upon the idea for these Santa’s Milk & Cookies Cheesecake Cups. Inspired by the classic milk and cookies we all know and love, I wanted to capture that festive flavor in a delightful little dessert that brings smiles without a hassle.
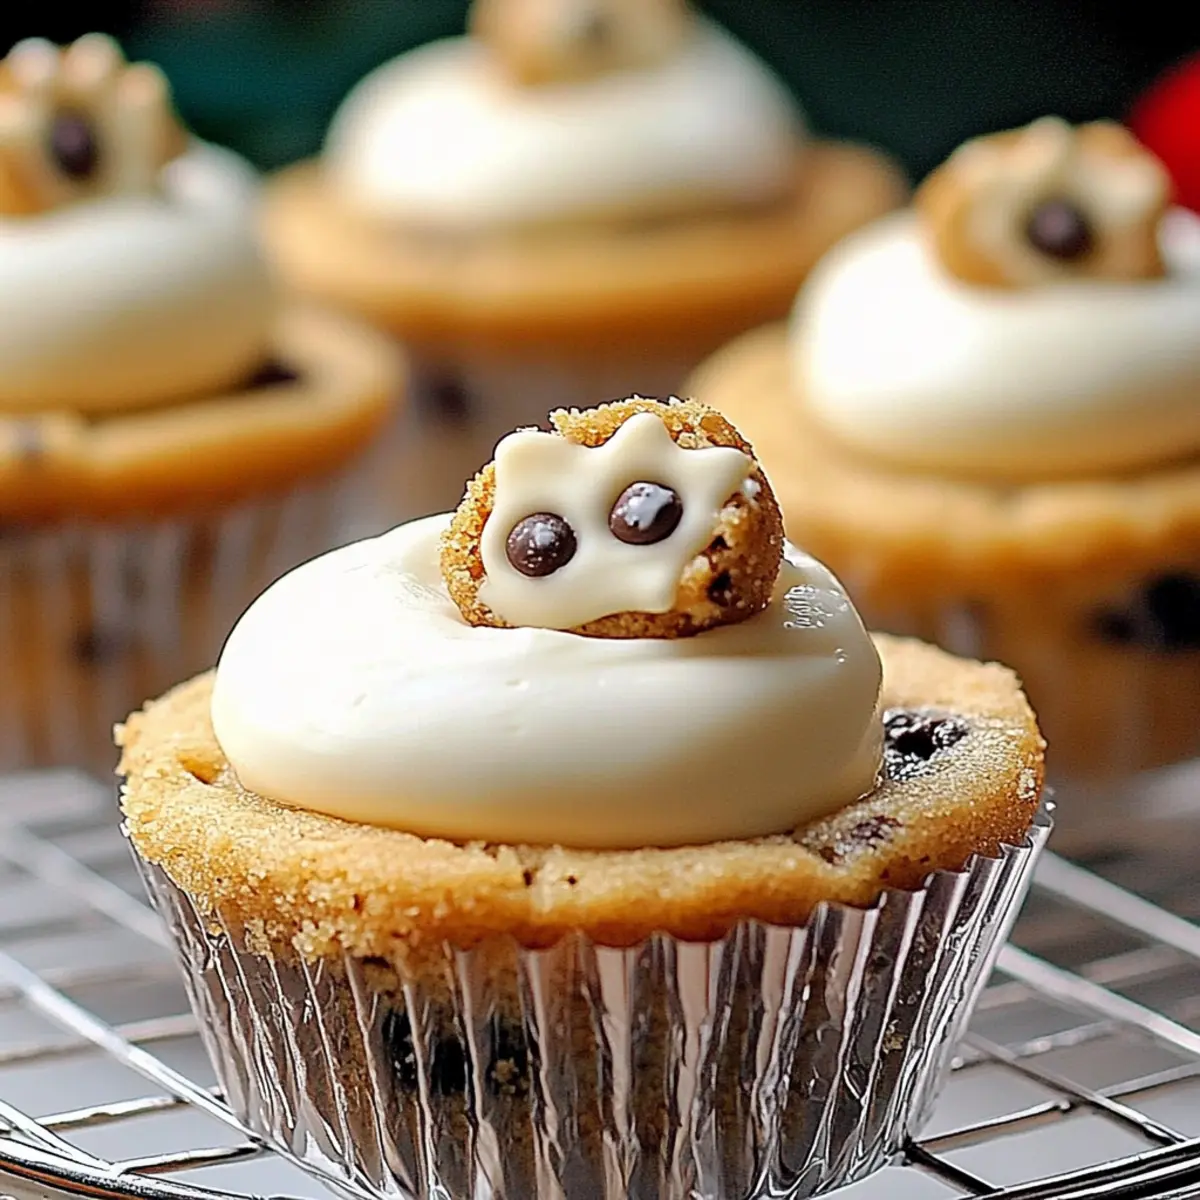
With just a handful of ingredients, including rich cream cheese and buttery chocolate cookies, these cheesecake cups are a breeze to whip up. Perfect for parties, cozy family gatherings, or simply when you want to treat yourself, they are not just easy to make but also an absolute crowd-pleaser. So, let’s dive into this delicious recipe that’s as festive as it is fulfilling! Prepare to create a dessert that will have everyone coming back for seconds—and trust me, they will!
Why You'll Love This Santa’s Milk & Cookies Cheesecake Cups
- These Santa’s Milk & Cookies Cheesecake Cups are incredibly easy to make, requiring only a handful of ingredients and minimal prep time.
- The delightful combination of rich cream cheese and chocolate cookies delivers a flavor experience that is both familiar and indulgent.
- Their charming presentation makes them visually appealing, adding a festive touch to any gathering or celebration.
- Not only are they a hit with both kids and adults, but their individual servings make them perfect for sharing without any mess.
- You will love how they bring joy to any occasion, making your dessert table stand out in the best way possible.
Santa’s Milk & Cookies Cheesecake Cups Ingredients
For the Crust
• Crushed chocolate cookies – you can use any brand, but Oreos give a classic flavor.
• Unsalted butter – melted, this binds the crumbs together beautifully.
For the Cheesecake Filling
• Cream cheese – make sure it’s softened for a smooth texture; this forms the creamy base.
• Granulated sugar – sweetens the mixture perfectly; you can substitute with a sugar alternative for a lighter version.
• Vanilla extract – enhances the flavor with a hint of warmth and nostalgia.
• Sour cream – adds a rich tang that balances the sweetness of the cheesecake.
For Topping
• Whipped cream – light and fluffy, it adds a delightful finish to each cup.
• Chocolate drizzle – this is the grand finale—go for a store-bought drizzle or make your own to really elevate these Santa’s Milk & Cookies Cheesecake Cups!
How to Make Santa’s Milk & Cookies Cheesecake Cups
-
Preheat the oven to 350°F (175°C). This step is crucial as it sets the perfect environment for your crust to bake evenly, creating a solid foundation for your cheesecake cups.
-
Combine crushed chocolate cookies and melted butter in a bowl until the mixture resembles wet sand. This will ensure that every bit of crumb is infused with buttery goodness, making your crust deliciously rich.
-
Press the cookie mixture into cupcake liners in a muffin tin. Use a spoon or your fingers to pack it down tightly, creating a sturdy base that will hold the cheesecake filling beautifully as it sets.
-
Bake for about 8 minutes until the crust is set. You’ll know it’s ready when it firms up slightly. Remove from the oven and allow it to cool completely before adding the filling—patience is key!
-
Beat softened cream cheese in another bowl until smooth. Gradually add the granulated sugar and vanilla extract, mixing until well combined. This creamy mixture should be luscious and devoid of lumps, promising a delightful texture.
-
Fold in the sour cream gently. Incorporating it carefully helps maintain the creaminess while ensuring a rich, tangy flavor balances the sweetness beautifully.
-
Spoon the cheesecake mixture into each cooled cookie crust generously. Fill them up to the top, as they will slightly settle and create a lovely layer of creamy goodness.
-
Refrigerate for at least 4 hours or overnight to allow the flavors to meld harmoniously. This chilling time is essential for achieving that perfect cheesecake texture.
-
Top each cheesecake cup with a dollop of whipped cream and a drizzle of chocolate sauce right before serving. This finishing touch adds visual appeal and an extra layer of delight.
Optional: Add festive sprinkles to the top for added cheer!
Exact quantities are listed in the recipe card below.
How to Store and Freeze Santa’s Milk & Cookies Cheesecake Cups
Fridge: Keep the cheesecake cups in an airtight container in the fridge for up to 5 days. This helps maintain their creamy texture and delicious flavors.
Freezer: If you want to store them longer, freeze the cheesecake cups (without toppings) for up to 2 months. Wrap each cup tightly in plastic wrap and then place them in a freezer-safe container.
Thawing: To enjoy your frozen Santa’s Milk & Cookies Cheesecake Cups, simply transfer them to the fridge and let them thaw overnight. Top with whipped cream and chocolate drizzle before serving.
Reheating: These cheesecake cups are best enjoyed cold or at room temperature, so avoid reheating them in the microwave.
Santa’s Milk & Cookies Cheesecake Cups Variations
Feel free to put your own spin on these delightful cheesecake cups and create new flavor experiences!
-
Gluten-Free: Swap chocolate cookies for gluten-free cookies or almond flour for a delectable treat that everyone can enjoy.
-
No-Bake: Omit the oven step and chill the crust mixture in the muffin tin instead; it’ll save time and keep your kitchen cool!
-
Flavor-Infused: Add a teaspoon of peppermint extract to the cheesecake filling for a refreshing twist that evokes holiday cheer.
-
Vegan: Use vegan cream cheese and coconut whipped cream to create a mouthwatering plant-based version that’s just as creamy and rich.
-
Fruit-Studded: Layer in fresh berries or banana slices atop the cheesecake filling before chilling. It adds a pop of color and a burst of freshness.
-
Nutty Crunch: Stir in crushed nuts or toffee bits into the crust for an added crunch that beautifully contrasts the creamy filling.
-
Decadent Chocolate: Mix melted chocolate into the cheesecake filling for chocolate lovers; it deepens the flavor and makes for a luscious dessert.
-
Spicy Kick: Incorporate a hint of cayenne or ground cinnamon into the cheesecake filling for a surprising warmth that elevates the experience!
Experimenting with these variations will make your Santa’s Milk & Cookies Cheesecake Cups uniquely yours—enjoy every delicious moment!
What to Serve with Santa’s Milk & Cookies Cheesecake Cups?
To create a delightful experience that complements your decadent dessert, consider these perfect pairings.
-
Warm Spiced Apple Cider: The warm spices elevate the sweetness of the cheesecake, creating a cozy and inviting atmosphere. It’s the perfect holiday drink to sip and enjoy.
-
Butter Pecan Ice Cream: A scoop of this creamy, nutty ice cream adds a crunchy contrast that balances the richness of the cheesecake cups.
-
Chocolate-Dipped Fruit: Strawberries or bananas dipped in chocolate match perfectly with the cheesecake’s flavors while adding a fresh, fruity touch.
-
Mini Fruit Tarts: Their lightness and crispy crust provide a refreshing contrast to the creamy cheesecake, making each bite interesting and exciting.
-
Gingerbread Cookies: These spiced cookies are not only festive but their crunch and spice harmonize wonderfully with the smooth cheesecake filling.
-
Peppermint Hot Chocolate: Topped with whipped cream, this drink adds a delightful festive flair that pairs beautifully with the flavors of the cheesecake.
-
Baileys Irish Cream Coffee: For an adult twist, this creamy coffee drink complements the dessert’s flavors, making it a cozy ending to a perfect meal.
-
Festive Cheeseboard: Use assorted cheeses, nuts, and dried fruits for texture; they blend beautifully with the cheesecake while offering a variety of flavors to explore.
Make Ahead Options
These Santa’s Milk & Cookies Cheesecake Cups are a fantastic choice for meal prep enthusiasts looking to save time on busy days! You can prepare the cookie crust and cheesecake filling separately up to 3 days in advance. Simply bake the crust and let it cool completely, then store it in an airtight container at room temperature. The cheesecake filling can be made and refrigerated in a sealed container overnight. When you’re ready to serve, simply spoon the filling into the prepped crusts, refrigerate for about 30 minutes to chill slightly, and finish with whipped cream and chocolate drizzle. With these make-ahead options, you’ll breeze through dessert preparation and enjoy delightful flavors without any hassle!
Chef's Helpful Tips
- To achieve the best crust for your Santa’s Milk & Cookies Cheesecake Cups, ensure that you press the cookie mixture firmly into the cupcake liners to create a sturdy base.
- A common mistake is overmixing the cream cheese filling; mix just until smooth for a creamy, lump-free texture.
- When incorporating the sour cream, fold gently to maintain the airiness of the mixture which adds to the cheesecake’s delightful lightness.
- Make sure to refrigerate the filled cups for at least 4 hours, or overnight if possible, to allow the flavors to meld beautifully and the cheesecake to set properly.
Santa’s Milk & Cookies Cheesecake Cups Recipe FAQs
How do I choose the right chocolate cookies for the crust?
I recommend using a brand like Oreos for their classic flavor and perfect crumbly texture. Look for cookies that are fresh and have no broken pieces, as these will create a more consistent crust without holes.
What’s the best way to store Santa’s Milk & Cookies Cheesecake Cups?
Keep them in an airtight container in the fridge for up to 5 days to ensure they stay creamy and flavorful. If you’re making them ahead, keep in mind that they’re best enjoyed cold or at room temperature!
Can I freeze Santa’s Milk & Cookies Cheesecake Cups?
Absolutely! To freeze them, first wrap each cheesecake cup tightly in plastic wrap. Then, place them in a freezer-safe container. They can be stored like this for up to 2 months. Just remember to unfreeze them in the fridge overnight before serving.
What should I do if my cheesecake mixture is lumpy?
Don’t worry! If your cheesecake mixture turns out lumpy, it’s often due to insufficiently softened cream cheese. For a smoother consistency, beat the cream cheese longer until it’s completely smooth before adding other ingredients. If lumps persist, you can strain the mixture through a fine mesh sieve for a velvety texture.
Are there any dietary considerations for Santa’s Milk & Cookies Cheesecake Cups?
Yes! If you’re concerned about allergies, keep in mind that this recipe contains dairy. You could try substituting the cream cheese and sour cream with lactose-free alternatives. For a gluten-free version, use gluten-free chocolate cookies, and always check the labels of products for cross-contamination.
How long should I chill the cheesecake cups for the best results?
I recommend refrigerating them for at least 4 hours or, even better, overnight. This allows the flavors to meld beautifully and helps them set properly, resulting in a luscious texture that will have everyone coming back for more!
Santa’s Milk & Cookies Cheesecake Cups
Ingredients
Equipment
Method
- Preheat the oven to 350°F (175°C).
- Combine crushed chocolate cookies and melted butter in a bowl until the mixture resembles wet sand.
- Press the cookie mixture into cupcake liners in a muffin tin.
- Bake for about 8 minutes until the crust is set. Allow to cool completely.
- Beat softened cream cheese until smooth. Gradually add the granulated sugar and vanilla extract.
- Fold in the sour cream gently.
- Spoon the cheesecake mixture into each cooled cookie crust generously.
- Refrigerate for at least 4 hours or overnight.
- Top each cheesecake cup with a dollop of whipped cream and a drizzle of chocolate sauce before serving.


Leave a Comment