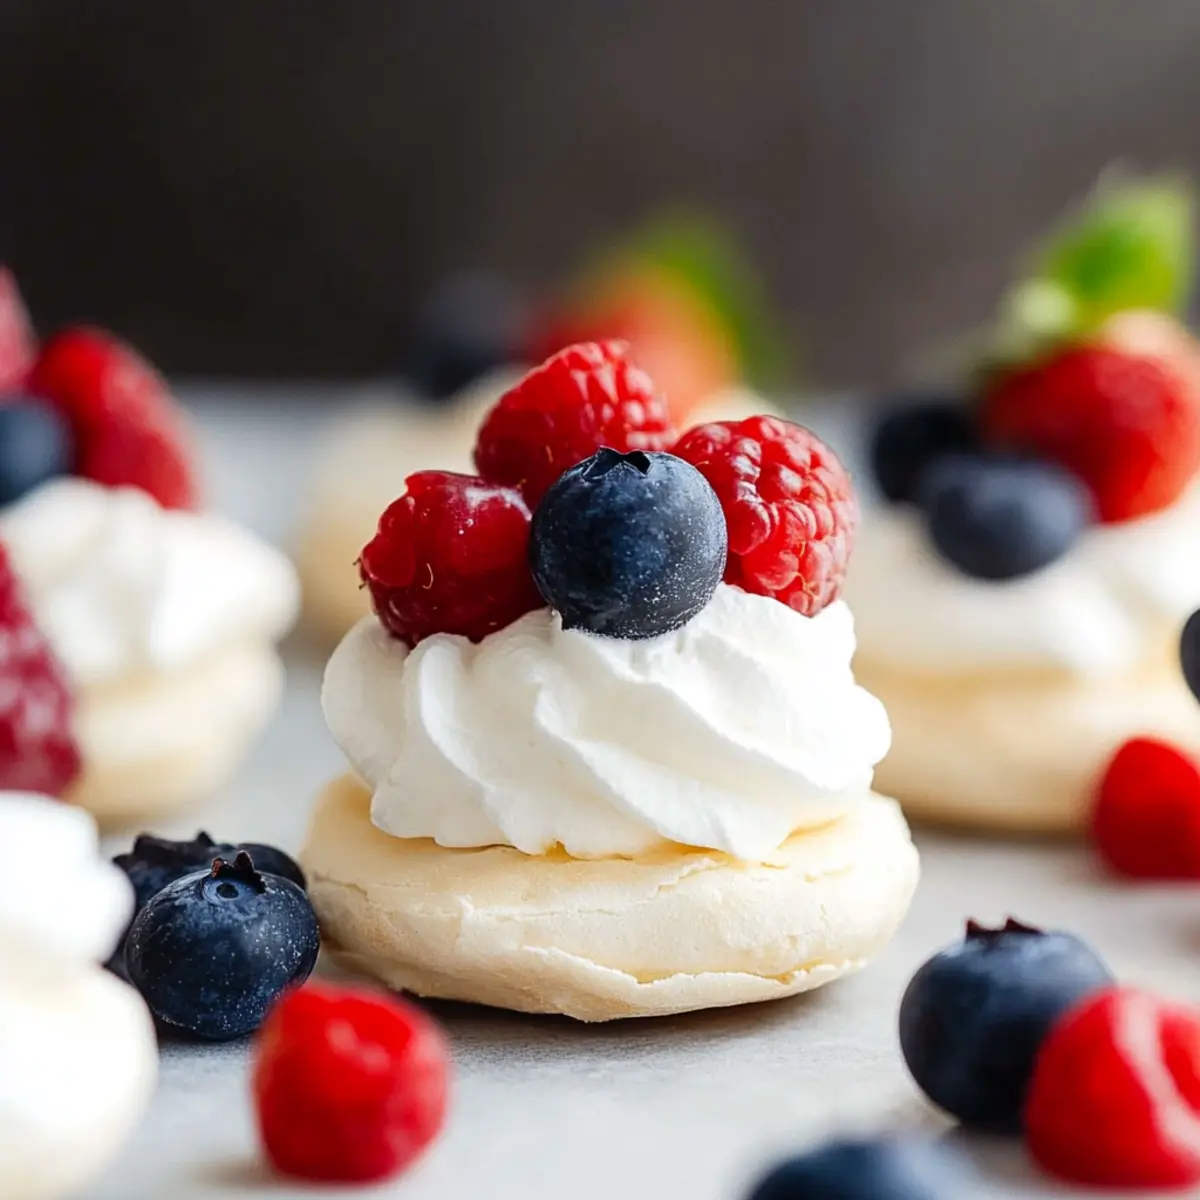
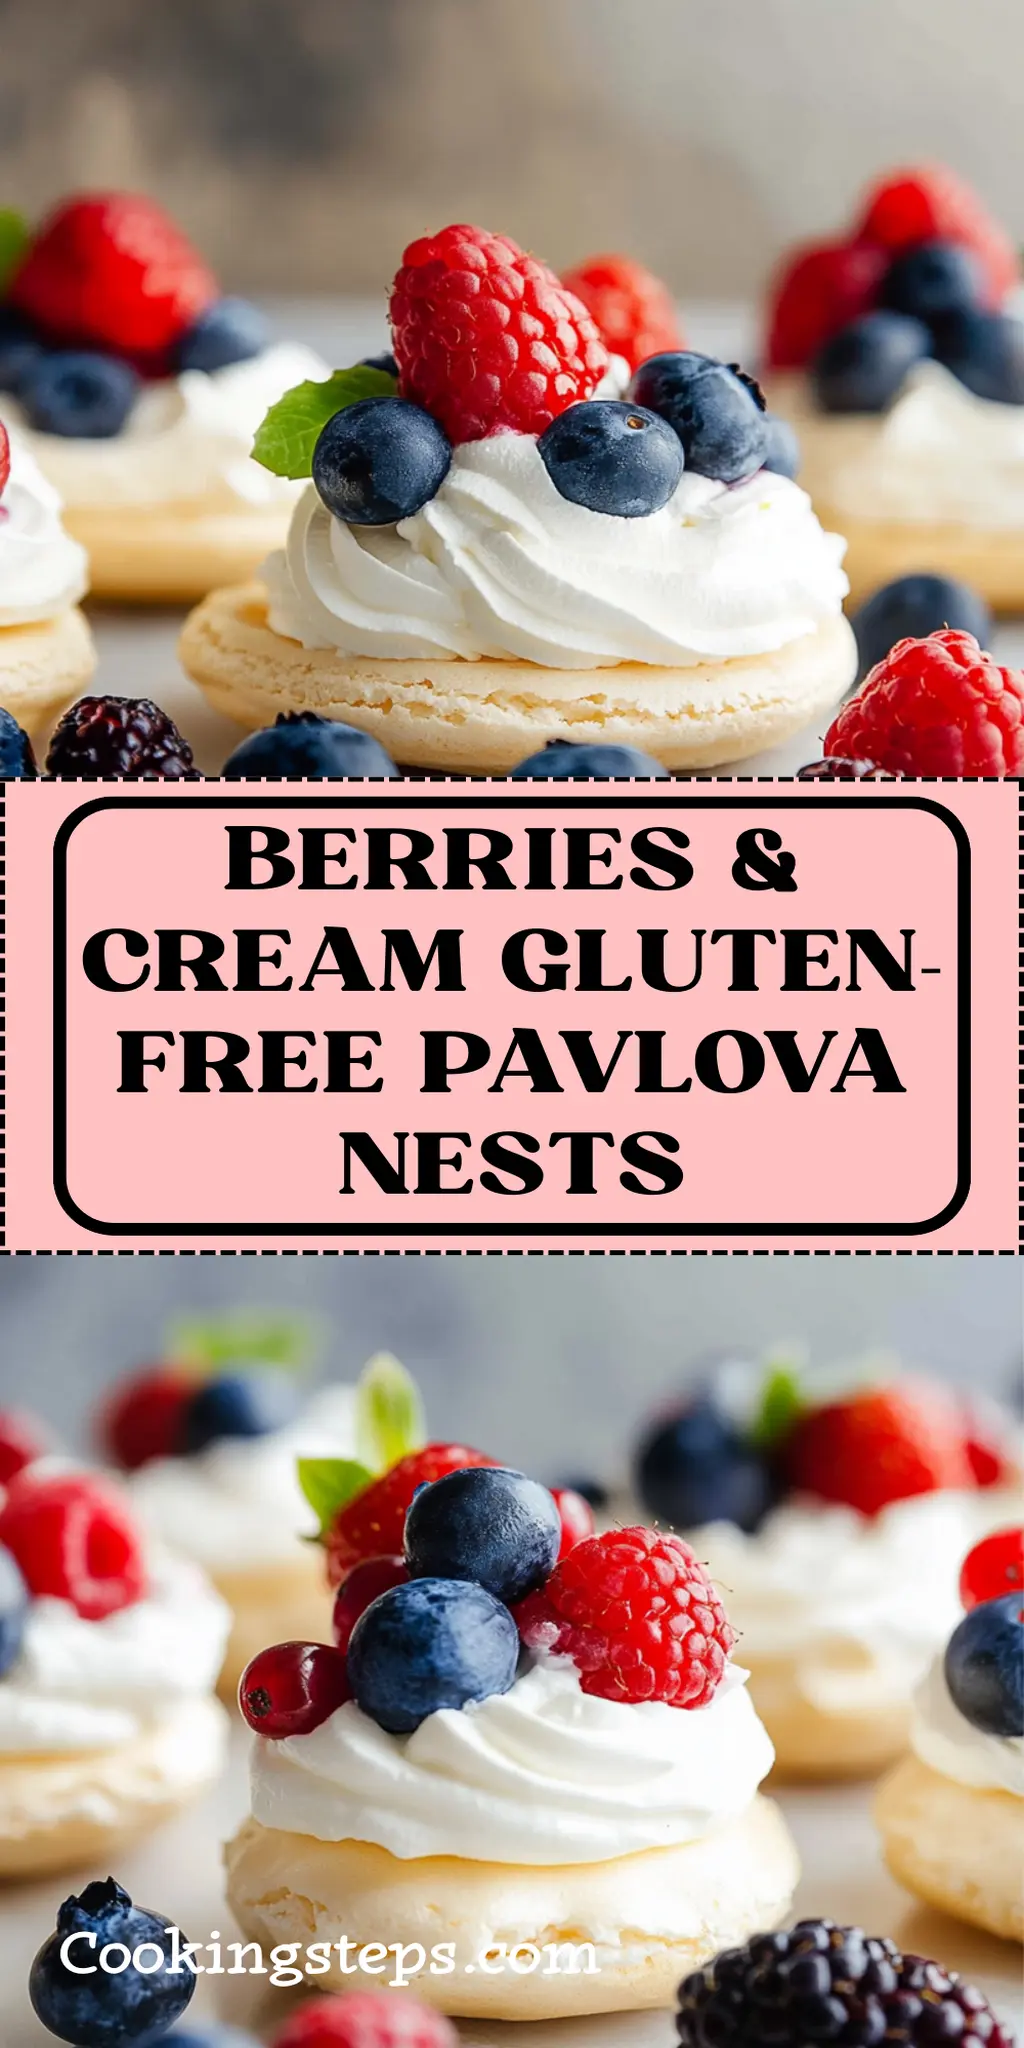
There’s a certain joy that comes with transforming simple ingredients into something extraordinary, and that’s exactly what my Berries & Cream Gluten-Free Pavlova Nests deliver. Picture this: a light and airy meringue shell that’s crisp on the outside and soft within, filled with velvety whipped cream and crowned with a vibrant medley of fresh berries. The first time I served these at a gathering, the table erupted in admiration – it was a moment that made me realize just how captivating dessert can be when it’s crafted with love and care.
With just a handful of ingredients and a little patience, you can elevate your dessert game and impress friends and family alike. Perfect for warm summer evenings or as a delightful way to celebrate special occasions, these nests are as versatile as they are delicious. Plus, the gluten-free aspect means everyone can indulge without worry! So, let’s whisk our way into this sweet adventure and discover how easy it is to create something truly enchanting right in your own kitchen.
Why You'll Love This Berries & Cream Gluten-Free Pavlova Nests
- This recipe is incredibly easy to make, allowing even novice bakers to create a stunning dessert with minimal effort.
- The delightful combination of crisp meringue, luscious whipped cream, and juicy fresh berries offers a flavor explosion that’s sure to impress your taste buds.
- Not only do these pavlova nests look beautiful on any dessert table, but they are also versatile enough to adapt with your favorite fruits or toppings.
- Plus, being gluten-free, they cater to a wider audience, making them a perfect crowd-pleasing treat for gatherings.
Berries & Cream Gluten-Free Pavlova Nests Ingredients
For the Meringue
- 4 large egg whites – Ensure your mixing bowl is clean and dry for best results.
- 1 cup granulated sugar – This creates the sweetness and structure for your pavlova.
- 1 tsp white vinegar – Adds stability to the meringue and helps achieve a lighter texture.
- 1 tsp cornstarch – Aids in creating a soft, chewy center inside the nest.
For the Cream Filling
- 1 cup heavy cream (cold) – The cold cream whips beautifully to fluffy perfection.
For the Toppings
- 2 cups mixed fresh berries – Use a vibrant mix of strawberries, blueberries, and raspberries for a delightful finishing touch.
With these simple yet essential ingredients, you’re all set to create your own delightful Berries & Cream Gluten-Free Pavlova Nests!
How to Make Berries & Cream Gluten-Free Pavlova Nests
-
Preheat oven: Set your oven to 225°F (110°C) and line two baking sheets with parchment paper. This ensures your meringue has a clean surface to bake on.
-
Whip egg whites: In a mixing bowl, use an electric mixer to whip the egg whites on medium speed until soft peaks form, which takes about 4-5 minutes. You’ll know they’re ready when they start to hold their shape but still look slightly glossy.
-
Add sugar gradually: Slowly sprinkle in the granulated sugar while beating on high speed. Keep mixing until the mixture is glossy and stiff peaks form, showcasing a beautifully shiny meringue. This should take another 3-5 minutes.
-
Fold in vinegar and cornstarch: Gently incorporate the white vinegar and cornstarch into the meringue. Be careful not to deflate the mixture; this ensures your nests maintain that light and airy texture.
-
Shape the meringue nest: Using a spoon or a piping bag, dollop the meringue onto the prepared baking sheets, shaping them into nests with wells in the center. This is where the cream and berries will sit, making it a delightful treat.
-
Bake to perfection: Place your meringue nests in the oven and bake for 1 hour 15 minutes. The outside should be crisp while the interior remains soft; leave them in the oven to cool completely afterward.
-
Whip cream and assemble: While the nests cool, whip the heavy cream until soft peaks form. Once the meringues are cool, fill each nest with the whipped cream and generously top with a beautiful mix of fresh berries.
Optional: Drizzle with honey for an extra touch of sweetness.
Exact quantities are listed in the recipe card below.
How to Store and Freeze Berries & Cream Gluten-Free Pavlova Nests
Room Temperature: Store meringue nests in an airtight container at room temperature for up to 2 days. This keeps them crisp and delicious!
Fridge: If filled with cream and berries, keep the assembled pavlova in the refrigerator for up to 4 hours. This ensures the cream stays fresh, though the meringue may soften over time.
Freezer: Unfilled meringue nests can be frozen for up to 1 month. Place them in a freezer-safe container, separating layers with parchment paper to prevent sticking.
Reheating: To refresh the texture of meringue nests after refrigeration, briefly bake them at 200°F (93°C) for about 10 minutes. This helps regain some crispiness before serving.
Make Ahead Options
These Berries & Cream Gluten-Free Pavlova Nests are perfect for meal prep! You can whip the meringue nests up to 24 hours in advance and store them in an airtight container to keep them crisp and fresh. Just ensure they are completely cooled before sealing to maintain their delicate texture. The whipped cream can also be prepared a day ahead; store it in the refrigerator in a covered container to keep it from deflating. When you’re ready to serve, simply fill the cooled nests with the cream and top with fresh berries, and you’ll have a stunning dessert ready to impress with minimal effort!
Berries & Cream Gluten-Free Pavlova Nests Variations
Customize your pavlova nests to delight your taste buds with unique flavors and textures!
-
Choco-Lovers: Add cocoa powder to your meringue mix for deliciously decadent chocolate pavlovas. The rich cocoa contrasts beautifully with the sweetness of the cream and berries.
-
Fruit Fiesta: Swap mixed berries for your favorite tropical fruits like mango and pineapple. Their bright flavors will transport you to a sunny paradise!
-
Nutty Twist: Sprinkle finely chopped nuts like pistachios or almonds into the meringue before baking for extra crunch and flavor. This adds a delightful surprise in every bite.
-
Citrus Zing: Fold in a teaspoon of lemon or orange zest to the whipped cream for a refreshing citrus kick. It brightens the overall flavor and balances the sweetness perfectly.
-
Spicy Kick: Drizzle a thin line of chili honey over the cream before adding berries. The heat complements the sweetness in an exciting way that your guests will love.
-
Dairy-Free Delight: Substitute coconut cream for heavy cream for a rich and creamy dairy-free option. It enhances the tropical vibe, especially with fruity toppings!
-
Chocolate Drizzle: After assembling, top your nests with a drizzle of melted dark chocolate for a beautiful and indulgent finish. It adds a touch of elegance to your dessert display.
-
Herb Infusion: Experiment by adding a sprinkle of fresh mint or basil on top for an unexpected herbal twist. The aromatic flavors lend a refreshing contrast to the rich cream and berries.
What to Serve with Berries & Cream Gluten-Free Pavlova Nests?
Looking to create a delightful meal experience that complements your enchanting dessert?
- Refreshing Fruit Salad: A vibrant mix of seasonal fruits adds brightness and a natural sweetness that pairs beautifully with the pavlova’s creamy filling.
- Minty Yogurt Sauce: A tangy yogurt sauce with fresh mint enhances the flavor profile and adds a cooling touch, perfect after a sweet bite.
- Sparkling Elderflower Lemonade: This effervescent drink balances the sweetness of the pavlova while adding a floral hint that dances on the palate.
- Chocolate Drizzled Strawberries: Dip fresh strawberries in melted chocolate for a quick, indulgent treat that echoes the berries in your pavlova.
- Crispy Biscotti: These crunchy cookies serve as a delightful textural contrast, perfect for dipping into hot beverages paired alongside your dessert.
- Decadent Chocolate Mousse: If you’re embracing a chocolate lover’s paradise, a light mousse will provide that rich depth, harmonizing perfectly with the airy pavlova.
- Zesty Citrus Sorbet: A chilled sorbet adds a refreshing zing that cleanses the palate and enhances the overall enjoyment of the meal.
- Roasted Almonds: Savory yet subtly sweet, these nuts add a satisfying crunch alongside your pavlova, making every bite an adventure.
Chef's Helpful Tips
- To achieve perfect meringue for your Berries & Cream Gluten-Free Pavlova Nests, ensure your mixing bowl and beaters are completely clean and free of any grease.
- A common mistake is adding sugar too rapidly; always sprinkle it in gradually to ensure it dissolves fully and creates a glossy finish.
- When folding in the vinegar and cornstarch, use a gentle hand to avoid deflating the mixture, which keeps the texture light and airy.
- Baking at 225°F (110°C) is crucial for slowly drying out the meringue; avoid opening the oven door during baking as this can cause cracks.
Berries & Cream Gluten-Free Pavlova Nests Recipe FAQs
How do I choose the right egg whites?
Absolutely! For the best meringue, select very fresh eggs. Older eggs can have loose whites, which do not whip up as well. Crack the eggs cold and separate the whites into a clean, dry bowl, as any fat can affect the whipping process.
What is the best way to store baked pavlova nests?
To keep your meringue nests crisp, store them in an airtight container at room temperature for up to 2 days. If you’ve already filled them with cream and berries, they should be kept in the fridge and consumed within 4 hours for the best texture.
Can I freeze my Berries & Cream Gluten-Free Pavlova Nests?
Yes, you can! Unfilled meringue nests freeze beautifully for up to 1 month. Just place them in a freezer-safe container, with layers separated by parchment paper to prevent sticking. When you’re ready to use them, thaw them at room temperature, and they’ll be perfect for filling with cream and berries.
What if my meringue cracks during baking?
Very! Cracking can happen for a few reasons, including temperature fluctuations in the oven. Make sure to bake at 225°F (110°C) and avoid opening the oven door while baking. If cracks appear, don’t worry! They’ll still be delicious, and you can fill them up with cream and berries to hide any imperfections.
Can these pavlova nests be made ahead of time?
Absolutely! You can prepare meringue nests a day in advance and store them in an airtight container at room temperature. Just whip the cream and assemble with fresh berries right before serving for the best presentation and taste.
Are pavlova nests suitable for people with dietary restrictions?
Yes! These Berries & Cream Gluten-Free Pavlova Nests are a fantastic gluten-free dessert option. However, if you’re serving someone with an egg allergy or dairy intolerance, consider alternative ingredients. There are vegan creams available that can substitute for the heavy cream, and aquafaba (the liquid from canned chickpeas) can replace egg whites for a plant-based meringue.
Berries & Cream Gluten-free Pavlova Nests
Ingredients
Equipment
Method
- Preheat oven: Set your oven to 225°F (110°C) and line two baking sheets with parchment paper.
- Whip egg whites: In a mixing bowl, whip the egg whites on medium speed until soft peaks form, about 4-5 minutes.
- Add sugar gradually: Slowly sprinkle in the granulated sugar while beating on high speed until glossy and stiff peaks form, another 3-5 minutes.
- Fold in vinegar and cornstarch: Gently incorporate the white vinegar and cornstarch into the meringue.
- Shape the meringue nest: Use a spoon or piping bag to dollop the meringue onto the baking sheets, shaping them into nests.
- Bake to perfection: Bake for 1 hour 15 minutes until crisp on the outside and soft inside.
- Whip cream and assemble: While nests cool, whip the heavy cream until soft peaks form. Fill each nest with whipped cream and top with fresh berries.

Leave a Comment